Steel and reinforcement's function in material retention rooms
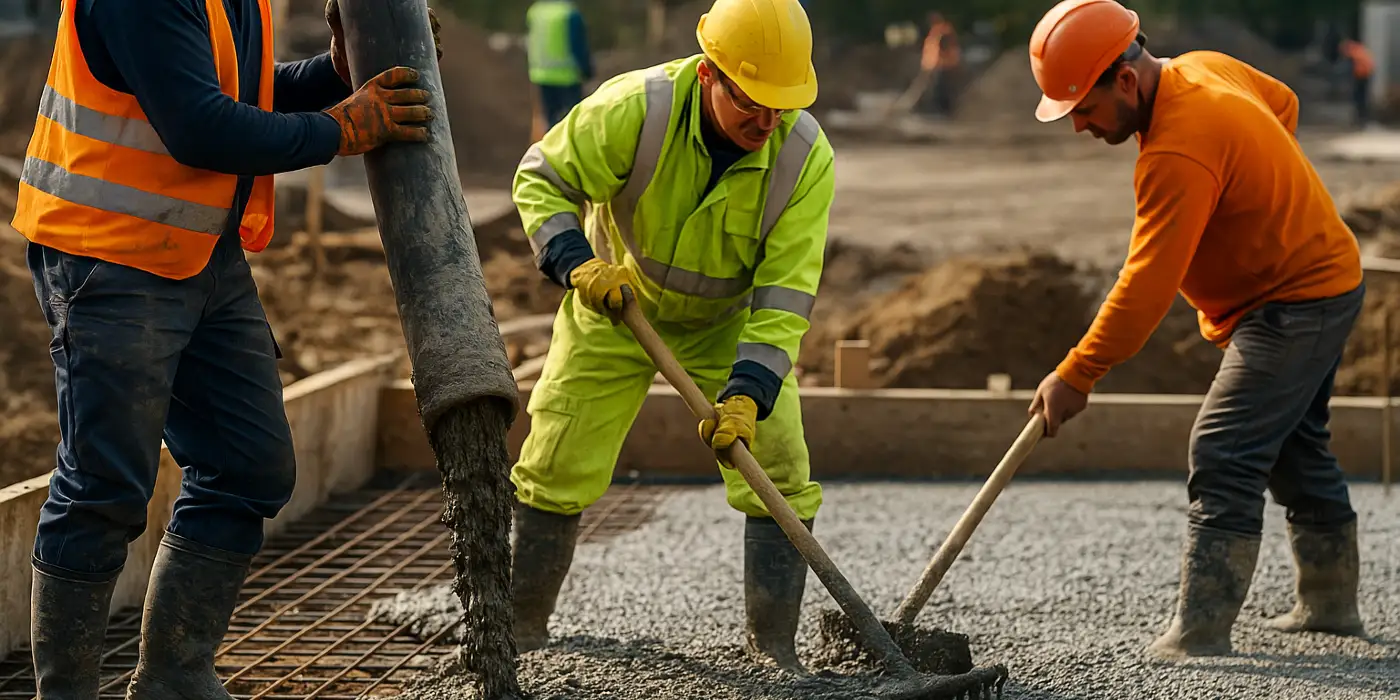
Concrete retaining walls look simple from the street, a clean face holding back soil. The engineering inside that concrete tells a different story. Soil pushes, water builds pressure, temperatures swing, and the ground settles over time. Unreinforced concrete is strong in compression but weak in tension, so the hidden steel that rides inside the wall determines whether it stands steady through winter thaws and spring rains or cracks, leans, and fails. When concrete contractors talk about reinforcement, they aren’t just following code for its own https://sanantonioconcretecontractor.net/driveway-repair-san-antonio-tx.html sake, they are building a safety margin into something that must work without drama for decades.

This article pulls from field practice and structural logic. The focus is specifically on rebar and supplemental reinforcement in concrete retaining walls, from small residential scenarios to commercial structures. If you are comparing concrete companies, reading concrete estimates, or standing near the forms as a cement truck backs in, the details here help you understand what matters and why.
What soil really does to a wall
Imagine a wall that is eight feet tall holding back a granular backfill on a rainy spring day. Every horizontal slice of soil pushes against the wall. That lateral pressure grows with depth, so the bottom of a wall sees the highest demand. Clay soils can grip and swell, sand behaves differently, and both change character when saturated. Walls also fight overturning, sliding, and bearing pressure at the toe of the footing. Freeze-thaw cycles and seismic events complicate the picture further.
The typical reinforced wall has a stem, footing, and a backfill zone with drainage. The stem bends under soil load, so the tension side of the section flips: for a cantilevered wall, tension concentrates at the back face near midheight and bottom, then migrates toward the front face near the top depending on load and restraint. That pattern tells you where rebar must live and how it should be anchored. Codes formalize the minimums, but the pressure profile is what really drives bar size, spacing, and development length.
Why concrete alone is not enough
Concrete excels under compression, easily achieving 3,000 to 5,000 psi compressive strength in common mixes. Under tension, its capacity is roughly one tenth of that, which means cracks form at relatively modest tensile stresses. A retaining wall stem behaves like a vertical cantilever beam fixed at the footing, so the tension demand is built in. Rebar solves this by taking tension and controlling crack widths so they remain tight and harmless. Without steel, a tall wall will crack, rotate, or both.
There is a second reason for steel that field crews know well. Construction tolerances are never perfect. Forms move a hair, vibration is uneven, subgrade is slightly softer in one spot. Reinforcement ties the mass together, so small imperfections do not localize into large failures.
Key components and where the steel goes
A typical cast-in-place concrete retaining wall has a footing, a vertical stem, and optional keys or buttresses. The reinforcement strategy follows the bending and shear demands.
- Vertical bars in the stem: These are the primary tension steel for cantilevered behavior. Bars often run continuous from the footing up to near the top, with proper development or mechanical splice if needed. Spacing commonly ranges from 8 to 18 inches on center depending on height and loads. The highest moment occurs near the base, so bars may be concentrated or sized up there.
- Horizontal bars in the stem: These bars control temperature and shrinkage cracking and help with horizontal bending between wall pilasters or local irregularities. They also tie vertical bars in place. On taller walls, horizontal bars participate in two-way action, easing crack widths under uneven loads.
- Footing reinforcement: Bottom bars near the soil side resist negative bending at the base. The wall acts as a cantilever from the footing, so you see tension steel on the bottom of the footing near the heel. Top bars near the toe may be required if the footing is wide and subject to bearing-induced flexure.
- Dowels and development: Vertical bars must be properly anchored into the footing. Hooked bars or straight bars with adequate development length transfer tension into the base. A frequent field error is cutting bars short to simplify placement. That saves minutes and costs dearly later. Good concrete contractors check bar tags, full embedment, and hook orientation before the pour.
- Drainage and geogrid: While not steel, drainage pipe, weep holes, filter fabric, and geogrid layers reduce pressure or stabilize backfill. The less hydrostatic pressure the wall sees, the lighter the reinforcement can be.
Reading soil conditions with an engineer’s eye
Two walls with the same height can require very different reinforcement. The soil classification and groundwater condition control the lateral earth pressure coefficient and whether you must account for buoyancy and uplift. A few field realities:
- Saturated clay can load a wall far more than dry granular backfill. If you plan to use native clay as backfill, assume heavier steel and more robust drainage.
- Free-draining granular backfill with a perforated drain at the heel, wrapped in filter fabric and sloped to daylight, cuts hydrostatic loads. That directly affects bar size and spacing.
- Surcharges matter. A driveway, a stored pallet of pavers, or even a fence line with wet snow can add line loads near the top of the wall. Small site choices change reinforcement.
- Frost depth influences footing embedment, which influences sliding and overturning resistance. A shallower footing might need a thicker stem with heavier rebar to compensate.
When concrete companies prepare concrete estimates, thorough ones ask about backfill type, drainage route, slopes above and below, and surcharges. If a bid ignores these, it likely carries more risk than the price suggests.
Minimum steel and the difference between code and practice
Building codes prescribe minimum reinforcement ratios for walls based on exposure, thickness, and load assumptions. Those minimums prevent sudden brittle failures and control crack widths. In practice, experienced crews and designers often exceed the minimums for two reasons. First, field conditions seldom match textbook cases. Second, modest increases in reinforcement reduce risk at small cost compared with total job budget.
On residential walls up to six feet high, a common pattern is No. 4 or No. 5 vertical bars at 12 inches on center with horizontal No. 4 bars at 16 to 18 inches. For eight to twelve feet, bar sizes and density step up, and the footing widens. Commercial walls carry their own logic, often moving to No. 6 verticals, closer spacing, and thicker stems. These are not prescriptions but examples of the drift in practice as risk rises.
Shear, not just bending
Design tends to focus on bending because it is intuitive, but shear governs many failures. Shear cracks form on a diagonal, roughly at a 45-degree angle from the base on the tension face. In tall or heavily loaded walls, stirrups or additional horizontal steel can become necessary to resist shear. The footing-to-stem joint requires careful detailing to handle both shear and bending transfer. It is common to run closed ties at the base region for a few feet of height, particularly when the wall is taller than ten feet or sees seismic demand. These ties keep the vertical bars engaged and confine concrete where stresses concentrate.
Development length, hooks, and splices that actually work
Bars do nothing until they transfer force into concrete. That transfer occurs through bond along the bar’s ribs. Development length depends on bar size, concrete strength, cover, and whether the steel is hooked. Straight development might need dozens of bar diameters. Hooks save space and provide reliable anchorage, especially in congested footings.
Mechanical couplers are worth their cost when staging pours or when the wall height demands splices beyond available bar lengths. Couplers reduce crowded laps, improve concrete consolidation, and make inspection straightforward. If a cement truck is an hour out and the rebar crew is still tying, couplers can save the day by speeding adjustments without compromising strength.
Cover and corrosion protection
Steel only works if it remains bonded and uncorroded. Minimum cover protects against moisture, chloride penetration, and fire. Typical exterior walls need at least 2 inches of cover to soil side, more if exposed to deicing salts. Chairs, dobies, and bar supports should be noncorroding and appropriate for exterior contact, and they must be placed at the right density to keep steel from sagging when workers walk the mats.
If the site is coastal or deicing salts can reach the wall, consider epoxy-coated reinforcing or added cover. Epoxy bars resist corrosion but are slightly more slippery, which increases required development length. That trade-off needs to be recognized at design time. Galvanized bars and stainless are specialty options reserved for severe exposures or key details like splash zones.
Temperature, shrinkage, and the art of crack control
Concrete shrinks as it cures and moves with temperature swings. Horizontal bars counter these effects, especially in longer runs. Control joints help, but retaining walls can rarely use too many joints without compromising water management. The practical method is to keep a steady mesh of horizontal steel in the outer third of the stem thickness on each face, especially the exposed face where temperature swings hit hardest.
There is a temptation to reduce horizontal steel to save money. That savings shows up later as map cracking and water tracks that stain the face. A stable grid of horizontal bars keeps those cracks tight and largely invisible, which is what owners care about.
Drainage is half the reinforcement plan
Every experienced builder has met a wall that looked stout on paper but leaked and bowed after a wet spring. Drainage behind the wall is never optional. Standard detailing includes a perforated drain pipe at the heel, pitched to daylight or a sump, with washed stone wrapped in nonwoven geotextile. Weep holes through the wall can help for shorter walls above grade. Waterproofing or dampproofing on the back face buys time and reduces saturation of the stem.
The less water you trap, the less rebar you need to sleep well. When concrete contractors bring modern concrete tools to site, the smartest tool might be a laser level and trench sled for proper drain slopes, not a fancy vibrator or cordless tie gun. No amount of steel fixes trapped water.
Constructability: getting bars where they belong
The best design fails if the crew cannot place it cleanly. Tight spacing with multiple bar layers makes consolidation hard, especially at the base where the stem meets the footing. Congestion blocks aggregate and leaves honeycombing. A few habits keep things clean:
- Use bar supports appropriate for exterior use and place them at intervals tight enough to keep steel steady under foot traffic.
- Separate curtain layers with fix spacers, not improvised pieces of wire or scrap. A half inch error in cover is huge for durability.
- Stage the pour so that the vibrator can reach the base of the stem and the heel. Choke points create voids that later leak.
- Tie steel firm enough to resist uplift during the pour but not so rigid that adjustment becomes impossible when aligning form ties.
- Coordinate with the ready-mix supplier on slump and aggregate size so the mix flows through the cage without segregation.
That list looks simple, yet on many sites at least one line is missed, usually when the schedule compresses and the cement truck is idling. Good foremen insist on a pre-pour walkdown with drawings in hand, then fix spacing and lap issues before mud arrives.
Choosing bar sizes and spacing with a practical mindset
Many walls can be reinforced multiple ways. You can use smaller bars at tight spacing or larger bars at wider spacing. Smaller bars distribute cracks more evenly and are easier to bend and tie. Larger bars reduce tie labor and sometimes improve clarity, but they can cause wider crack spacing. Production crews often prefer No. 5 bars over No. 6 when spacing allows, because #5 bends cleaner on site and seats better in tight corners. For heavy walls, a mix of bar sizes, heavier at the bottom and lighter near the top, keeps costs sane while matching the real demand curve.
Engineering calculations will set the minimum steel area. Craftsmen refine that into patterns that respect lap lengths, standard bar stock lengths, and clean bar schedules. Well-written concrete estimates spell out the bar sizes, grades, spacing, and lap locations, not just a tonnage. That level of clarity reduces change orders and keeps everyone honest.
Footing details that prevent sliding and overturning
A retaining wall is not just a vertical element. The footing provides stabilizing weight and lever arm. Wider heels add counterweight but also raise the need for drainage to remove water under the backfill. A shear key, a notch cast below the footing, increases sliding resistance without a huge bump in concrete volume. It is easy to form and gives insurance when subgrade friction is uncertain.
Rebar in the footing must align with the wall behavior. Bottom bars near the heel resist tension from overturning. Top bars near the toe handle local negative moment from bearing pressure. At turns and corners, extra bars stitch the geometry. If a property line forces a narrow heel, expect heavier rebar to compensate and possibly a taller stem. Constraints in site geometry often cascade into reinforcement patterns.
Working with inspections and small changes that matter
Structural inspectors focus on a few critical items: cover, bar size and spacing, lap lengths, hooks at the base, and continuity through corners and steps. Each of these has a big effect on performance. Adding a step in the footing to follow grade, for example, requires careful bar continuation. If it is not detailed, crews will improvise. Smart concrete companies issue simple sketches for every step, corner, and termination so the field has no reason to guess.
Small substitutions can also help without changing engineering intent. Mechanical couplers in a congested base region. Swapping a few No. 4 horizontals for a single No. 5 when lap space is limited. Using epoxy-coated bars only in the splash zone while keeping plain steel elsewhere to keep development lengths friendly. These are the kinds of adjustments that builders and engineers hash out on a phone call before the pour. They do not move the price needle much but often decide whether the job feels smooth or strained.
Modern concrete tools that improve reinforcement work
Better tools reduce error. A battery rebar tying gun speeds repetitive ties and keeps consistent tension. Laser levels and smart levels help align dowels. Vibrators with variable frequency improve consolidation without blowing out forms. On big jobs, bar lists tied to QR codes and tablets reduce mix-ups between bar marks. None of these replace judgment, but they let a crew spend attention where it counts, like checking the first two lifts at the base of the stem.
Even the cement truck can be a tool for quality. Coordinating arrival times to allow a continuous pour prevents cold joints in sensitive regions. Communicating target slump and any admixtures keeps the mix workable around the cage. If a delay is unavoidable, a well-timed retarder or an extra pass with the vibrator at the joint can salvage quality.
Seismic considerations and ductility
In seismic regions, walls must flex and return. That means ductility. Additional ties and closer spacing at plastic hinge regions near the base keep concrete confined and bars anchored, so the wall yields without losing core integrity. Engineers specify splice locations away from high moment regions. Field crews enforce it by placing couplers or laps outside the first few feet above the footing. Bar hooks and tie patterns become nonnegotiable. The cost bump is modest compared to the consequence of brittle behavior during a quake.
Precast vs. cast-in-place and the role of reinforcement
Precast retaining systems arrive with reinforcement embedded, quality controlled in a plant. They rely on connections between panels and footings to transfer forces. When a site needs speed or has limited forming access, precast shines. Cast-in-place gives maximum flexibility for stepped grades, complex curves, or variable heights. Both rely on steel, but their failure modes differ. Precast connections must be detailed and inspected with the same rigor as on-site bars. Skimp on connection hardware and you lose the benefits of factory quality.
Maintenance and how reinforcement choices show up years later
Well-detailed walls age gracefully. Tight hairline cracks, clean drainage, no rust streaks, and a plumb face after winters of freeze-thaw, these mark a wall that had the right steel in the right place. Poor detailing shows early: diagonal cracks starting near the base, damp bands or efflorescence on the face, spalls where cover was too thin. Once rust starts, repairs cost far more than doing it right at the start. Cathodic protection and patch repair can save a wall, but they are bandages. Good reinforcement design and execution is the long-term fix you build once.
What to look for in concrete estimates and contractor proposals
Owners and builders juggle schedules and budgets, so it helps to know which line items deserve scrutiny. Respect for reinforcement is usually obvious in the paperwork.
- A clear rebar schedule: bar sizes, spacing, grades, laps, and locations, not just tonnage.
- Details for drainage: pipe size and route, fabric spec, weep holes, and waterproofing.
- Notes on cover, chairs, and supports suitable for exterior exposure.
- Coordination plan for concrete placement: pour sequence, vibrator access, and cold joint strategy.
- A line for inspection and as-built verification, including photos before the pour.
If two concrete estimates are close in price but one spells out these details and the other doesn’t, pick the one with clarity. That is the bid that reflects intent to build the wall you think you are getting.
Real-world examples that shape judgment
A municipal wall near a snow route: The first design used plain bars with minimum cover. After one winter, rust staining appeared along hairline cracks at the splash zone. A modest switch to epoxy-coated horizontal bars for the lower three feet and an extra half inch of cover ended the issue, with no changes above grade.
A residential hillside with expansive clay: The owner wanted to reuse excavated clay for backfill. The engineer doubled down on drainage and specified a geogrid-reinforced backfill with a free-draining layer against the wall. Vertical bars increased one size near the base, and the wall received additional horizontal steel to limit crack widths. Five years on, the wall remains plumb through droughts and wet winters because water never built pressure.
A warehouse yard with forklifts near the wall crest: The surcharge from traffic was underestimated in early sketches. A quick recalculation before rebar delivery led to a wider heel, a shear key, and tighter spacing of vertical bars. The cost increase was small, but it prevented excessive rotation at the top that shows up when heavy equipment hugs the edge.
Coordinating the pour so reinforcement performs
Concrete must surround and bond to the steel. That seems obvious until you face a congested cage at the base, a tight window for traffic control, and a line of trucks. The simple rules matter most:
- Start placement where congestion is highest and work away from it so fresh concrete can flow and air can escape.
- Keep lift heights modest and vibrate intentionally, inserting vertically and withdrawing slowly to avoid trapping air against bars.
- Watch for cage movement during the first few yards. If supports shift and cover is lost, stop and fix before proceeding.
- Protect the top mat from being stepped out of place. Assign a laborer whose only job is to watch steel during the pour.
- Track the time between lifts. If a cold joint is forming, roughen and retouch with a bonding grout or mix as specified.
These steps are mundane. They are also the fabric of quality. The best crews hit them without theatrics, which is why their walls look unremarkable years later, in the best sense.
The long view: reinforcement as risk management
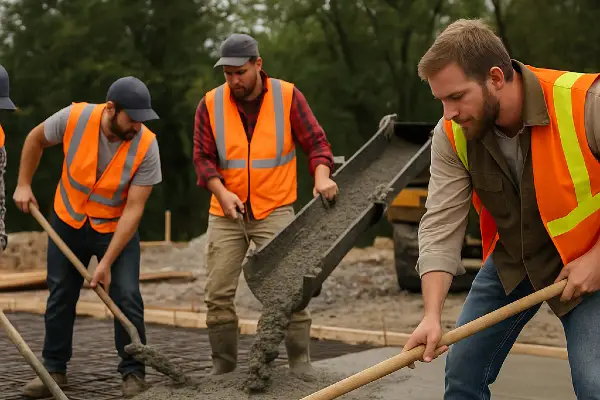
Steel is insurance you can see. It does not make a wall pretty, it makes a wall predictable. In a field where the loads are messy and the variables many, predictable is the prize. Good concrete contractors lean on experience, not bravado. They choose bar sizes that tie easily, details that place cleanly, and drainage that keeps the pressure honest. They use modern concrete tools to tighten the process, not to replace craft. They coordinate the cement truck schedule with reinforcement checks, because no amount of steel helps if concrete cannot reach it and bond well.
Concrete retaining walls succeed when structural logic meets practical execution. Rebar and reinforcement sit at the core of that meeting. Get them right, and the wall becomes one of those quiet structures that nobody mentions after the landscaping goes in, which is exactly the outcome everyone wants.
Name: San Antonio Concrete Contractor
Address: 4814 West Ave, San Antonio, TX 78213
Phone: (210) 405-7125
This is the logo of San Antonio Concrete Contractor https://sanantonioconcretecontractor.net/assets/san-antonio-concrete-contractor-san-antonio-tx-logo.png
San Antonio Concrete Contractor is a local business located at 4814 West Ave, San Antonio, TX 78213
San Antonio Concrete Contractor serves consumers with residential and commercial concrete projects
San Antonio Concrete Contractor offers free quotes and assessment
San Antonio Concrete Contractor phone number is (210) 405-7125
San Antonio Concrete Contractor has the following website https://sanantonioconcretecontractor.net/
San Antonio Concrete Contractor has the following google map listing https://share.google/d8wsdJhNohh11Oyi5
San Antonio Concrete Contractor has this Facebook page https://www.facebook.com/profile.php?id=61581404267593
San Antonio Concrete Contractor has this twitter profile https://x.com/SanAntConcContr
San Antonio Concrete Contractor has this Pinterest profile https://www.pinterest.com/SanAntonioConcreteContractor/
San Antonio Concrete Contractor has the following Linkedin page https://www.linkedin.com/in/san-antonio-concrete-contractor-846606388/
San Antonio Concrete Contractor has this Youtube channel https://www.youtube.com/@SanAntonioConcreteContractor
San Antonio Concrete Contractor serves residents near Thomas Jefferson High School
San Antonio Concrete Contractor provides services near The Alamo.
San Antonio Concrete Contractor helps residents close to San Antonio Police Department at 3635 E Houston St, San Antonio, TX 78219