Photographer Melbourne: Panning Techniques for Sports Motion
Melbourne has a way of turning weather into a live exercise. One weekend the footy oval is glass-smooth and the light is forgiving, and the next you are shooting through wind-blown dust with a grey sky that never quite decides to brighten. That unpredictability is exactly why panning matters so much when you photograph sport.
Panning is one of those skills that looks simple from the stands, then quickly proves itself expensive in time and frustration once you start aiming at moving bodies. The goal is not just to “track the subject.” It is to deliberately create a motion signature where the athlete is sharp enough to hold attention, and the background blur is consistent enough to feel like speed rather than missed focus.
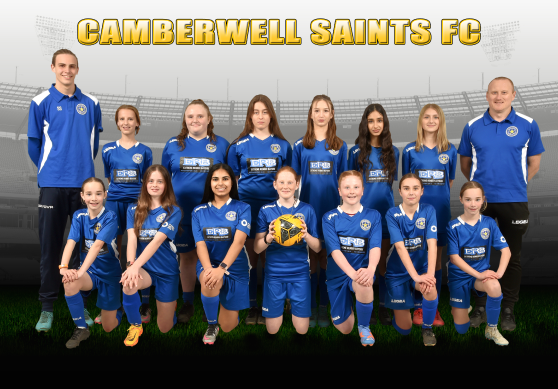
Whether you are a photographer Melbourne sports teams hire for match days, or an independent shooter building a portfolio, panning is a practical technique you can refine quickly. It sits right at the intersection of anticipation, timing, camera settings, and physical coordination. When it works, it makes even a routine play feel dynamic.
What panning actually changes in your camera
Most people think panning is mostly about your hands. Hands matter, but the camera mechanics matter too.

When you pan correctly, you are intentionally introducing movement in the background at the moment of exposure. If your shutter speed is slow enough, and your tracking is smooth enough, the athlete’s motion relative to the camera stays controlled, while the background sweeps across the frame. The result is a subject that can be acceptably sharp, paired with a blur that visually matches the direction and pace of travel.
If the shutter speed is too fast, you will get freezing instead of speed. If it is too slow, you will smear the subject as well. And if your tracking wanders, you will miss focus or create that unpleasant middle ground where nothing looks clearly right.
For Melbourne sports photography, the practical question is always: what shutter speed range gives you a “sport look” without sacrificing subject sharpness beyond what clients accept? The answer depends on subject speed, distance, focal length, and how steady your tracking is.
Starting point settings that work on a lot of Melbourne sports scenes
You do not need a complicated system, but you do need a dependable baseline. When I teach panning at sports shoots, I usually start with a shutter speed that is slow enough to create blur, and fast enough that a well-tracked subject can remain sharp.
Here are solid starting ranges I see work across many field and court sports in Melbourne conditions, where the action is often predictable in direction even if the athlete’s speed varies:
- Shutter speed: typically between 1/60 and 1/250 depending on speed and lens length
- Focusing mode: continuous autofocus (AI Servo/AF-C style), with subject tracking if your camera supports it
- Drive mode: burst, because you cannot time perfection every frame
- Stabilisation: either on with a panning-aware setting, or off if you find it fights your movement (this varies by lens, and it is worth testing)
- Exposure mode: shutter priority or manual with auto ISO, so you hold the shutter while the camera rides ISO through changing light
In Melbourne, light can shift between shade and sun in seconds, especially around ovals with trees. Holding shutter speed constant keeps your motion blur consistent, which is what makes panning look intentional across a full set of images.
A quick panning setup checklist (use this like a ritual)
- Set your shutter speed to the middle of your target range, then adjust after the first frames
- Use continuous AF with tracking, and keep your focus point near the athlete’s chest or upper torso
- Choose burst mode, because the peak frame often lands in the middle of a short sequence
- Plan your stance and start tracking before the athlete enters the “clean” part of the background
- Shoot, review instantly, and be ready to change shutter speed, not just your technique
That last point matters. Many photographers assume they need to “try harder” with their body mechanics. Often the body is fine, and the shutter speed is the real problem.
The lens and focal length trade-off
Focal length changes everything about panning because it changes how much the subject fills your frame and how forgiving the motion becomes.
With a shorter lens, you get a wider field of view. That can help because the subject crosses the frame smoothly and you have more room for tracking. But wide lenses also tend to show more background complexity, which can make blur feel messy instead of stylish.
With a longer lens, the subject takes up more of the frame and the depth of field gets thinner. That is great for isolating the athlete, and it is what many Melbourne sports photographer workflows lean on for portrait-style action. The downside is unforgiving timing. At long focal lengths, a small wobble in your pan can translate into missed focus or a subject blur that ruins the effect.
In practice, if you are photographing from the sideline on many Melbourne grounds, a telephoto zoom is a common choice because it lets you reframe without moving. Keep in mind that reframing mid-play can force you to break your pan rhythm.
A useful mental rule: the longer the lens, the more you should prioritize stable tracking over aggressive speed. You are not sprinting with your camera. You are guiding it.
Shutter speed: how to dial in the “sports motion” look
Shutter speed is your steering wheel. Panning lives or dies here.
At around 1/60 to 1/80, the background blur will be obvious even at moderate speeds. This is where you can get that “wow” look, but it is also where the subject sharpness becomes fragile. If you are panning a player in quick acceleration, you might find the blur overpowers them unless your tracking is extremely consistent.
Around 1/125 to 1/160, you often get the best balance for fast field sports. The subject can stay sharp enough to feel real, while the background blur still reads as speed. For many photographer Melbourne sports assignments, this is the range I would call the workhorse band.
Around 1/250 and up, you are moving toward freeze-frame with slight motion cues. This can still look like panning if your technique is good, but the blur becomes subtler. The higher the shutter speed, the more you are depending on tracking precision and the “micro-smoothness” of your pan to create blur rather than relying on time.
The big mistake is treating shutter speed as a one-time decision. Conditions change. The athlete’s speed changes. The distance changes. The background texture changes. A panning set that starts beautifully at 1/160 can start failing five minutes later when the light drops and ISO climbs, or when the action shifts to a different lane of play.
Where to focus: don’t chase the wrong part of the body
In sports, athletes are full of motion. Arms swing, legs kick, heads turn, and torsos twist. Autofocus will naturally lock onto high-contrast areas, and in some sports that can be unpredictable.
For panning, I recommend focusing on a part of the body that stays relatively coherent during the action, usually the torso or upper chest. In running and field play, it often gives the AF system a stable target. In contact sports, it can be trickier because the torso can disappear behind arms or other bodies, but the same principle applies: pick something that remains in frame as long as possible.
When the subject’s head whips around, you might be tempted to chase it. Resist that urge for panning shots. Head movement makes the AF system hunt, and if it hunts at a slow shutter speed, you will get a soft subject even though your pan is smooth.
A lived reality from match days: you can have a “perfect pan” where the background blur looks amazing, and the photo still disappoints because your focus point caught a swinging arm instead of the torso. Panning is not a single skill. It is tracking plus focus discipline, repeated under pressure.
Your body technique: start early and keep your pan smooth
The best panning shots usually come from photographers who treat the pan like a guided sweep rather than a snap. The camera should move continuously at roughly the subject’s speed, not accelerate and decelerate wildly.
Begin tracking before the decisive moment. If you start when the athlete is already passing you, you are often late by a fraction of a second. Sports motion is fast, and your brain needs that extra runway to coordinate your feet, your shoulders, and the view through the lens.
Stance matters. If you brace too tightly, you introduce micro jerks. If you stand too loose, the pan becomes wobbly. I usually look for a stable base with knees slightly soft, a torso rotation that leads the pan, and feet that pivot rather than hop.
One detail that sounds small but makes a difference: watch where the lens points at the start of your pan. If you aim slightly behind, you can end up “correcting” mid-exposure, and that correction is exactly what produces subject blur.
Think of it like keeping a train in the frame. You are not dragging it with your hand. You are matching your speed to the track.
A panning technique checklist that actually helps in the field
- Start tracking before the athlete enters your chosen background area
- Keep your view steady, move your whole upper body, and avoid sudden wrist corrections
- Maintain a consistent pan speed through the exposure, even if the athlete accelerates
- Fire a short burst, because the best sharpness often lands within 2-6 frames
- Review immediately and adjust shutter speed first, then technique second
That sequence helps because it prevents you from spiraling into guesswork. You fix the most likely variable first.
Timing and burst strategy: why five frames can beat one hero shot
Sport photography often rewards photographers who accept that perfection is probabilistic. Your job is to create a narrow probability window where at least one frame nails the balance of subject sharpness and background blur.
Burst mode helps because it gives you multiple “attempts” without you changing your body mechanics. Your pan speed might not be identical frame to frame, but it is usually close. The athlete’s position also shifts, and autofocus decisions can vary slightly in each frame.
In practice, I aim for short bursts that cover the part of the action where the background looks clean and the subject stays consistent in direction. If you burst too long, you waste frames on messy backgrounds and moments where the athlete turns or overlaps with another player.
For Melbourne sports photography where editors and clients want a set rather than a single image, this approach is even more valuable. You build a rhythm: pan into the play, capture the best fraction, then reset for the next instance.
Background matters more than you think
Panning blur is only “clean” if the background blur is directionally consistent and visually coherent. A chaotic background makes the motion look noisy. A simple background makes the blur look like a deliberate streak of energy.
On Melbourne ovals, the best panning backgrounds are often:
- areas with grass and consistent texture
- fences with repeated vertical patterns
- the far side of an oval where the crowd is less dense
Behind you, the worst backgrounds tend to be cluttered and close, like sponsor boards directly behind athletes, or areas with poles that create unpredictable blur lines across the subject.
When you are moving along the sideline, you can sometimes reposition by a few meters between plays. That changes the background dramatically. If you have ever wondered why two photographers standing “almost the same spot” produce different panning looks, this is often why.
Stabilisation, monopods, and “the fight” between systems
A lot of photographers use monopods for sports to keep fatigue down during long days. Panning with a monopod can be excellent, but it changes how stabilization behaves.
Some lens stabilisation systems are excellent and allow natural panning motion. Others can introduce https://puresportimages.com.au/ a micro correction that disrupts the smooth sweep you are trying to create. The result is a subject that looks slightly “wobble softened” even when you feel like you panned perfectly.
If you are not sure, do a controlled test at the start of an event. Take a few test frames of a moving subject at your intended shutter speed, with stabilisation on and off, from the same stance. Compare. Pick what gives you consistent sharpness on the subject.
For shooters who regularly deliver sports photography Melbourne clients expect, consistency beats ideology. Use the settings that get you repeatable results.
Sport types: where panning shines and where it fights you
Panning is not universally the best technique for every sport moment. It shines when the athlete’s movement is directional for long enough and the subject stays clear of obstructions.
In many Melbourne games, panning is a perfect match for:
- runners on straight or gently curved paths
- cyclists or racers moving across your frame
- players moving laterally with consistent torso orientation
It becomes harder when the sport demands sudden changes of direction or heavy overlap. In dense contact situations, autofocus can jump between faces, limbs, and uniforms. Even if your pan is smooth, the camera might struggle to keep the same focus target.
This is where judgment matters. You do not need to pan everything. You need to choose the moments where panning can win. A professional sports photographer Melbourne workflow often mixes techniques, switching between freeze-frame for impacts and panning for transitions.
Pure Sport Images, for example, is often about delivering a clean story of motion and effort. That typically means using panning when it enhances the narrative of speed and intent, not when it muddies the details you need for action authenticity.
Working with unpredictable Melbourne weather
Wind is a quiet enemy of panning because it affects both your physical stance and the visual presentation of the background. When wind drives grass or dust, the scene becomes more textured. That texture can make motion blur look messy, especially at slower shutter speeds.
Cloud cover also changes contrast quickly. Low contrast can make autofocus hunting more likely, particularly if the athlete’s subject is not high-contrast against the background.
Two practical adjustments help. First, keep your shutter speed in a band that still produces motion blur but preserves your ability to maintain focus. Second, consider focusing on a high-contrast part of the subject, like a darker jersey against lighter background, rather than whatever the AF system grabs at random.
If you notice that panning shots are coming out inconsistent, do not assume technique drift. Check contrast and autofocus behavior. It might be a “scene” problem rather than a “you” problem.
Editing reality: what panning images need in post
Even with careful technique, panning images often require slightly different editing than freeze-frame sports. Motion blur can reveal edges and artifacts that look fine at first glance but soften the subject on closer inspection.
A light touch is usually the best approach. Sharpening can help, but aggressive sharpening on a frame that is slightly out of focus will make the blur look crunchy instead of smooth. When a subject is truly sharp, selective sharpening is safe. When the subject is marginal, treat the image gently and focus on proper exposure and contrast.
Also, be aware that background blur can introduce colour shifts. If the background is moving and the shutter speed is slow, auto white balance might behave differently across frames. If you deliver a set for sports photography Melbourne clients, you want those frames to feel like they belong together. Consistent white balance and contrast bring unity.
The point is not to rescue bad technique. It is to polish the frames where panning was already successful.
Common mistakes that cost hours
Panning has a learning curve that can feel humbling. The most expensive part is re-shooting the same moment in your head instead of adjusting what matters next time. Here are the mistakes I see waste the most time.
First, holding the camera too tense. Tension turns smooth tracking into micro stutters. Second, starting the pan too late. If you wait for the athlete to hit a specific spot before you move, you are already behind the exposure window. Third, changing focus aim while panning. If your eyes and your focus point chase the wrong part of the subject, your AF system has to make more decisions than it can reliably make at the frame rate.
Fourth, relying on shutter speed alone. If your shutter speed is perfect but your pan speed is inconsistent, you will still lose sharpness. And fifth, not reviewing quickly enough. In sports, you only get a few chances at the moments that look right. If you review after the event, you will improve too slowly.
When you get it right: what the viewer feels
A well-executed panning image does something specific. It makes the viewer feel the direction of movement. The background blur should “pull” behind the subject, not smear randomly across them. The subject should read clearly in shape and expression, because that is where the story is.
On a busy weekend in Melbourne, those panning frames are often the ones that stand out in a gallery. They communicate effort and speed, not just documentation. They also tend to perform well for social media and client presentations because the motion is immediately legible, even at smaller sizes.
That legibility is why photographer Melbourne sports shooters keep chasing this technique. It is not just aesthetics. It is clarity.
Building your panning portfolio the efficient way
If you are developing your style as a Melbourne sports photographer, the best practice is to build evidence. Shoot repeated scenarios with the same settings so you can compare results. Try the same shutter speed on similar motion, then adjust one variable at a time.
It is tempting to chase variety. For panning, that can slow you down. Better to master a few controlled patterns: a straight sprint on a track, a lateral run along a sideline, a consistent pass in a sport where players travel in predictable arcs.
Over time, you will start to feel how fast you need to move your body for a given focal length. You will also get better at choosing backgrounds. That background choice is often the difference between “cool motion” and “professional sports photography Melbourne” quality.
And if you deliver as part of a team or a commercial brand like Pure Sport Images, you will find that consistency matters as much as dramatic frames. Clients want sets that feel cohesive, not a handful of lucky winners among uncertain results.
Final note on improvement: measure progress, not frustration
Panning teaches you to trust process. Your first dozen attempts will likely include more misses than keepers. That is normal. What matters is the shift you create in your next session based on what you learned from the previous one.
If you change shutter speed and get better subject sharpness, you know one variable is working. If your sharpness stays inconsistent but your blur direction improves, it might be technique and tracking smoothness rather than exposure. If autofocus seems to hunt, you might need to adjust how you select focus area or how you place the subject in the frame.
Sports motion is relentless. Your job is to become a little more predictable under pressure. Each time you step into position at the next Melbourne event, you get another chance to turn motion into clarity.
If you want, tell me which sport you shoot most often, the camera model you use, and your typical lens range. I can suggest a tighter panning shutter speed band and a focus approach tailored to those conditions.
Pure Sport Images
23 Grandview Ave, Mulgrave VIC 3170, Australia
+61 413 157 614
[email protected]
